
Storytelling Box component assembly and fabrication (in process!)
Below we are collecting tips for makers and builders.
Cross-iteration: With each technical experiment, re-think your story!
With each piece of technology you insert or consider, re-think your narrative and content approach. (See also the iterative design spiral in classic texts like Fullerton’s Game Design Workshop.)
Step 1: Get inspired by our video demo of the Storytelling Box
- Demo #2: Storytelling Box and Make-Your-Own-Exhibit Poster, based on the MLK Library case
- Demo #1: Duck and Fairy demo
Video preview of a storytelling box in action (9/2022):
Possible technologies:

Step 2: Try a Makey Makey with arcade buttons for input
Get familiar with the Makey Makey (cost around $50 for a basic unit). Plug it into your laptop, and verify that you can simulate the left and right arrow keys, such as in a word processor document or in a PowerPoint slideshow.
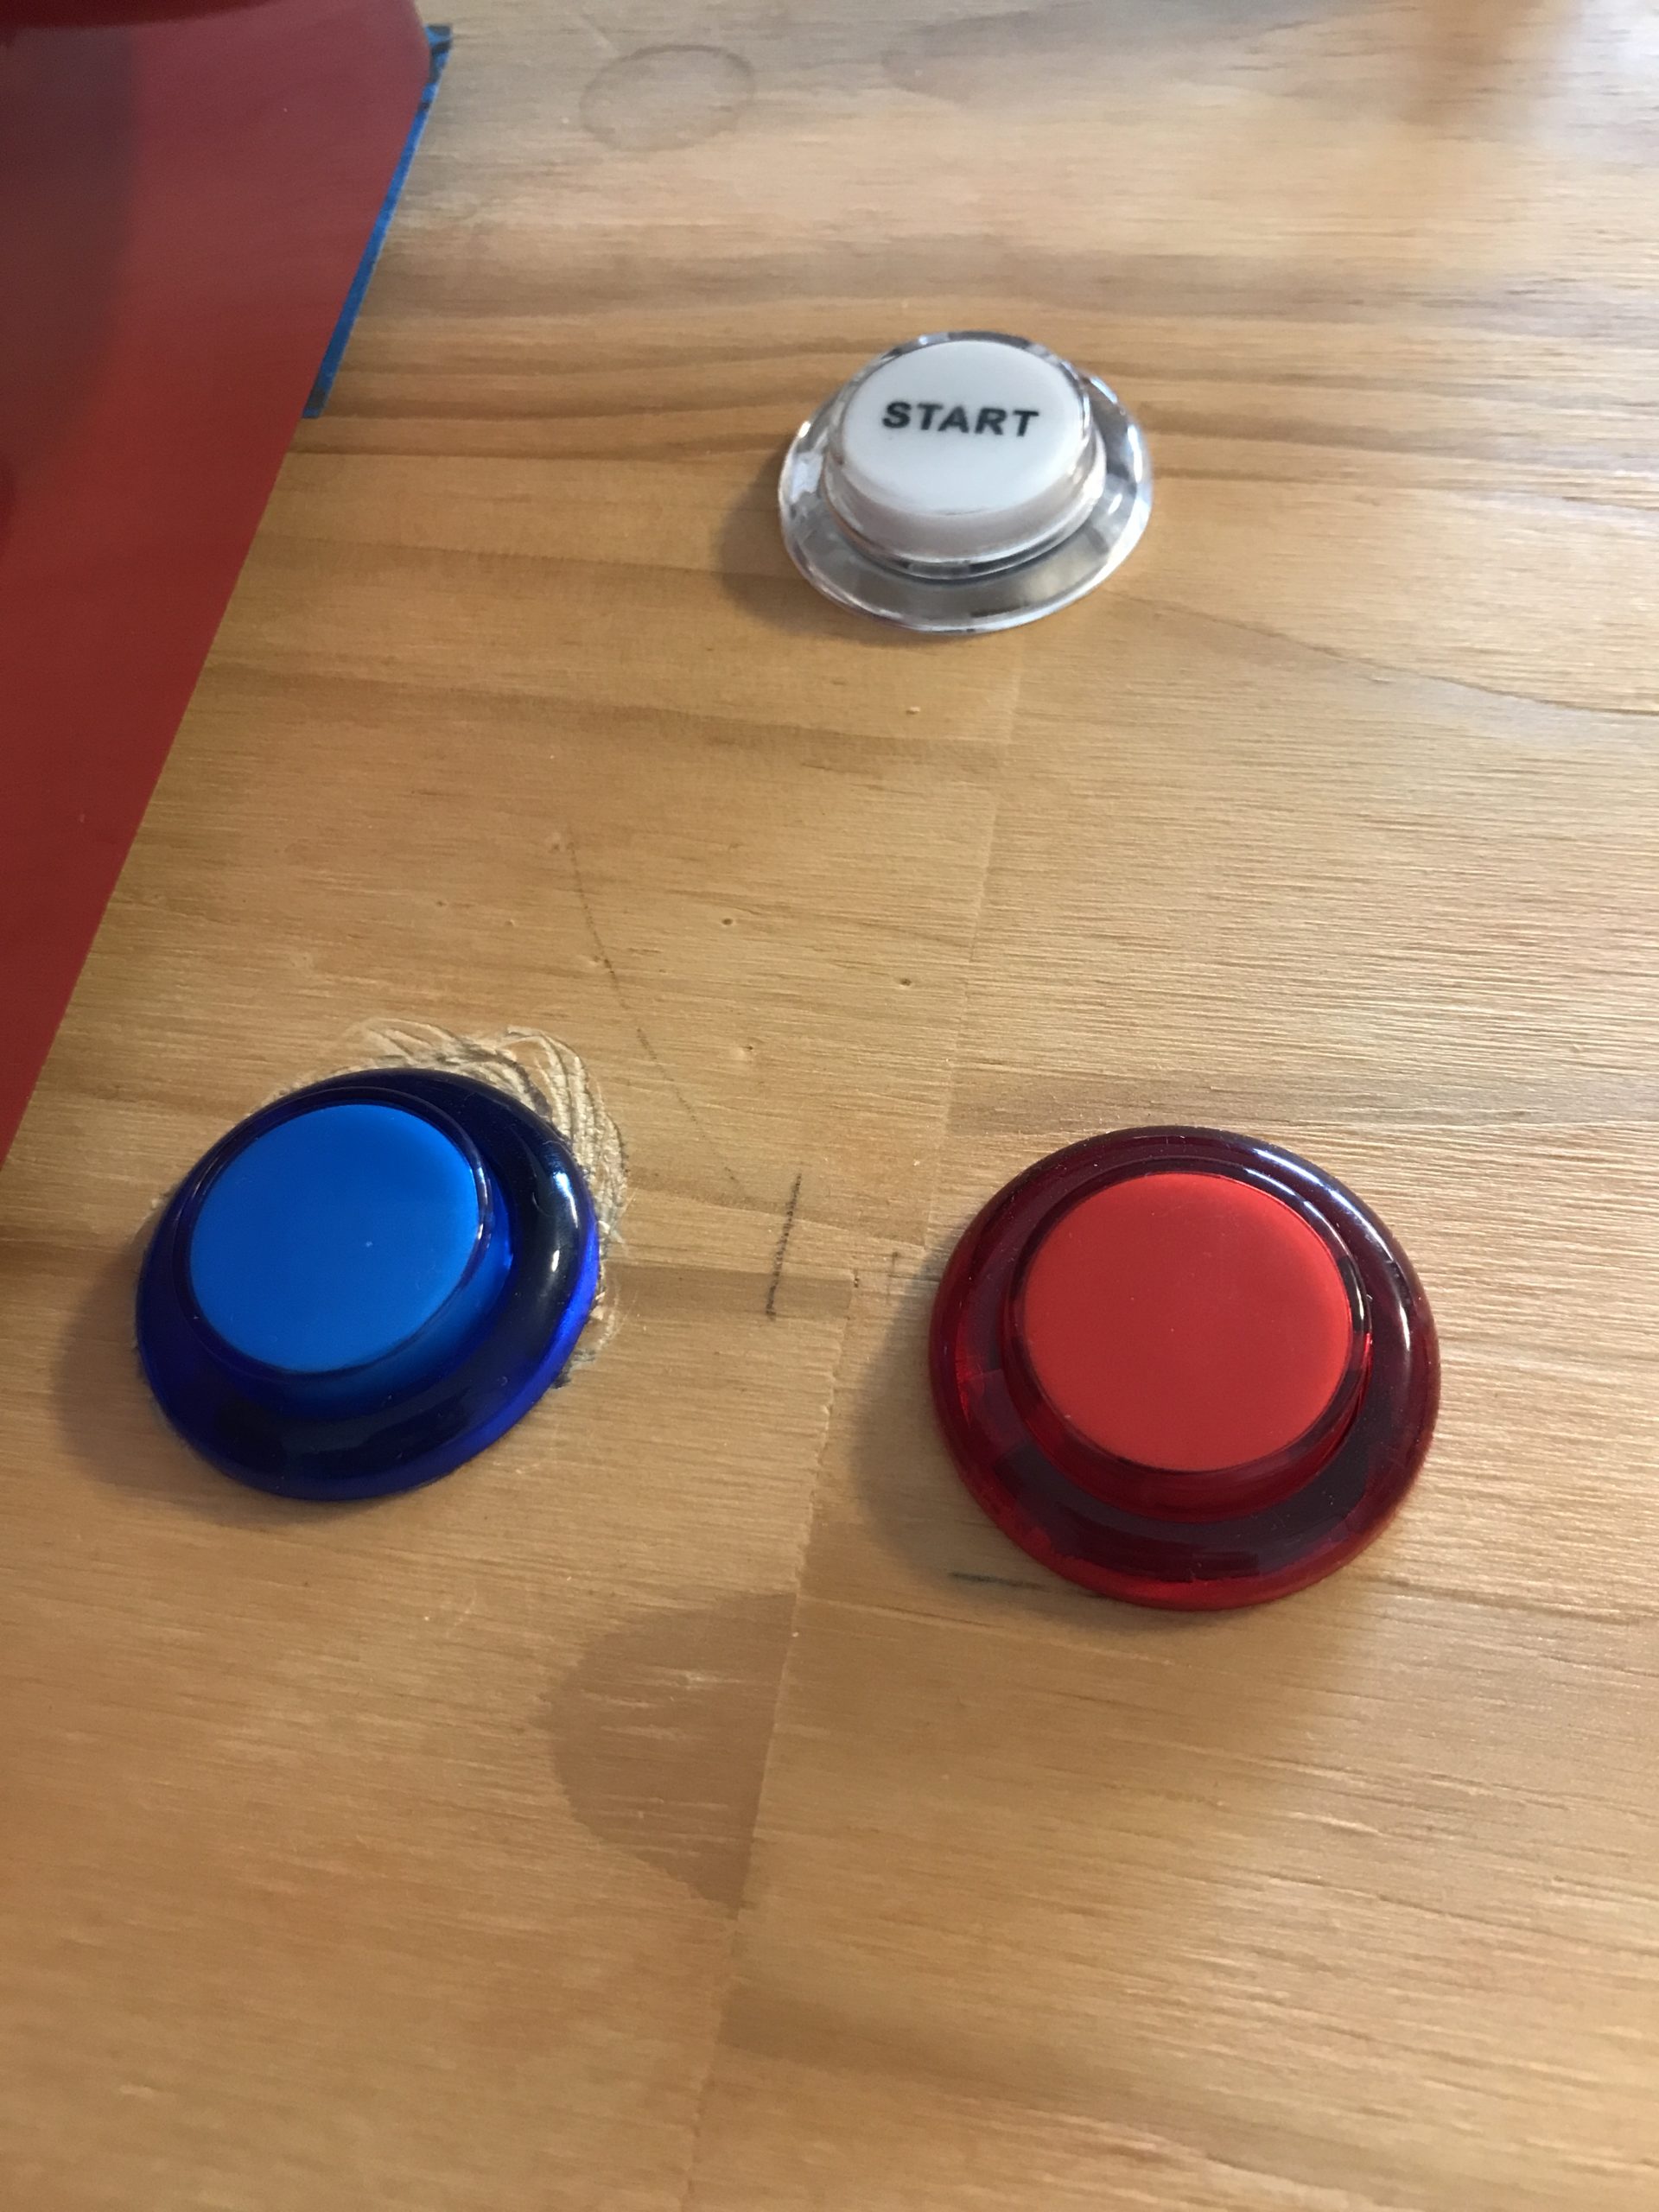
Step 3: Embed your buttons in cardboard, wood, etc.
A wood installation might look like this:
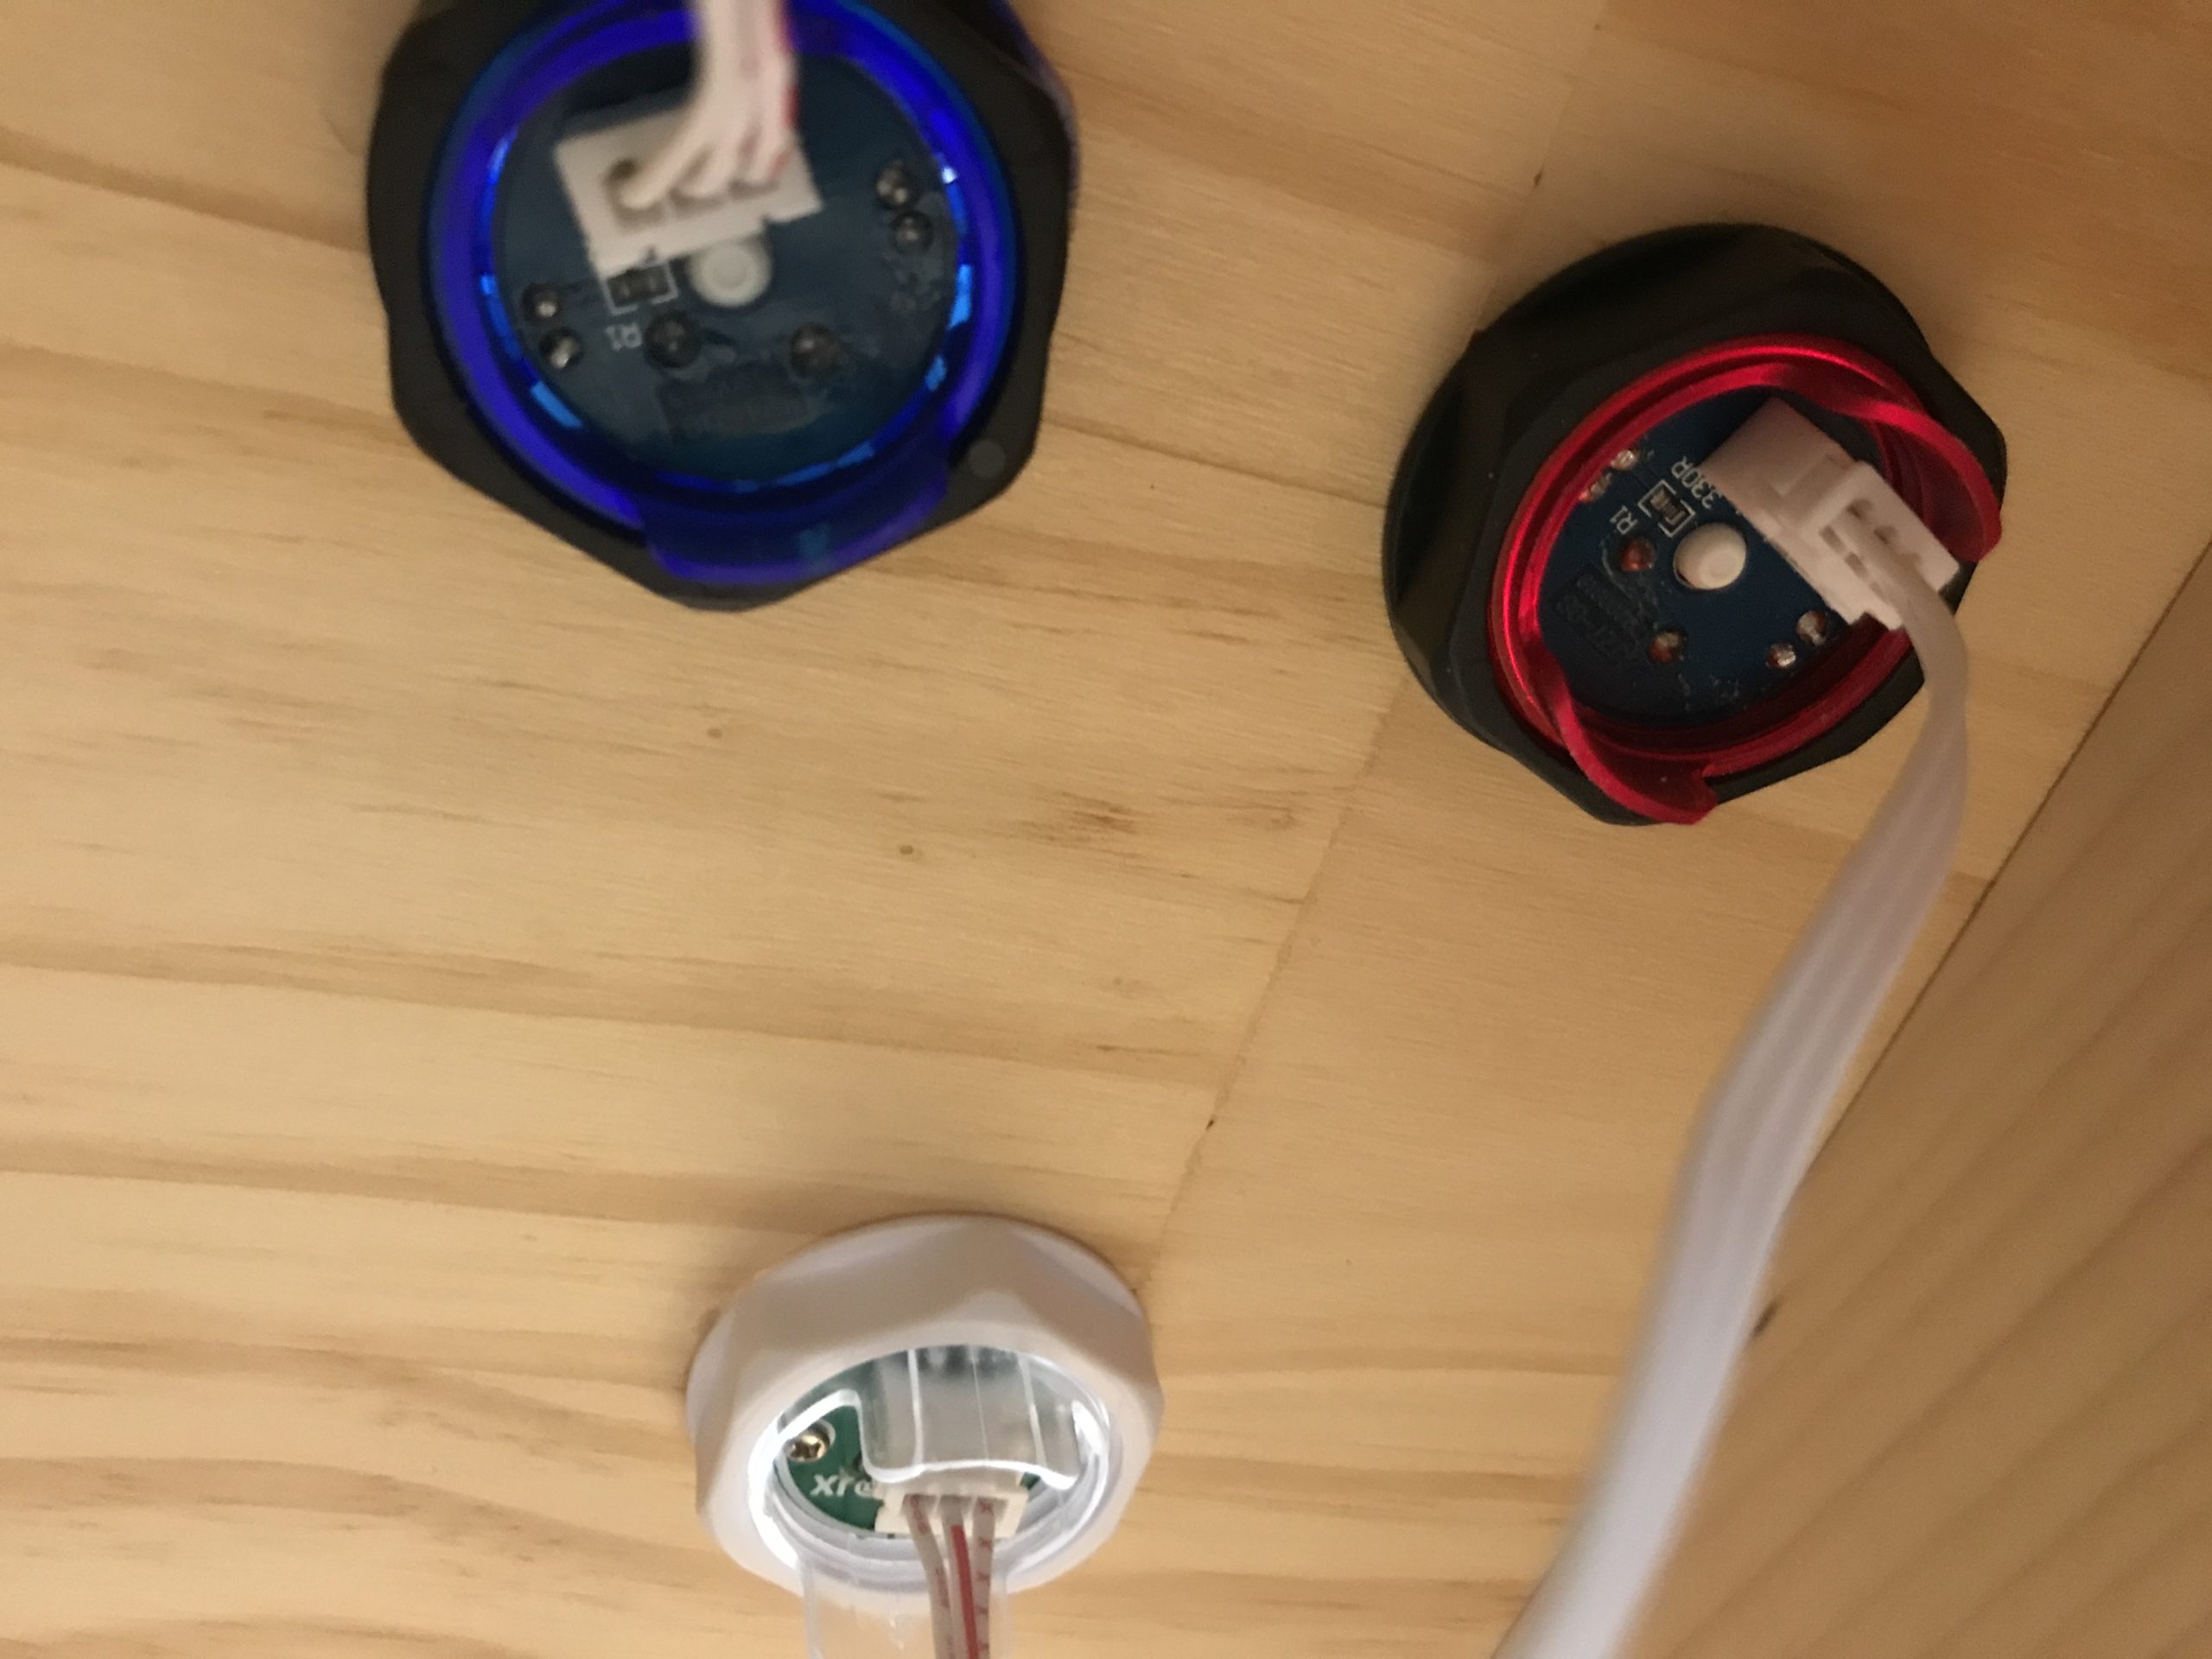
Underneath, the buttons look like this:
To keep the wiring simple, we are using single wire plugs that slide into the cables provided by the arcade buttons:
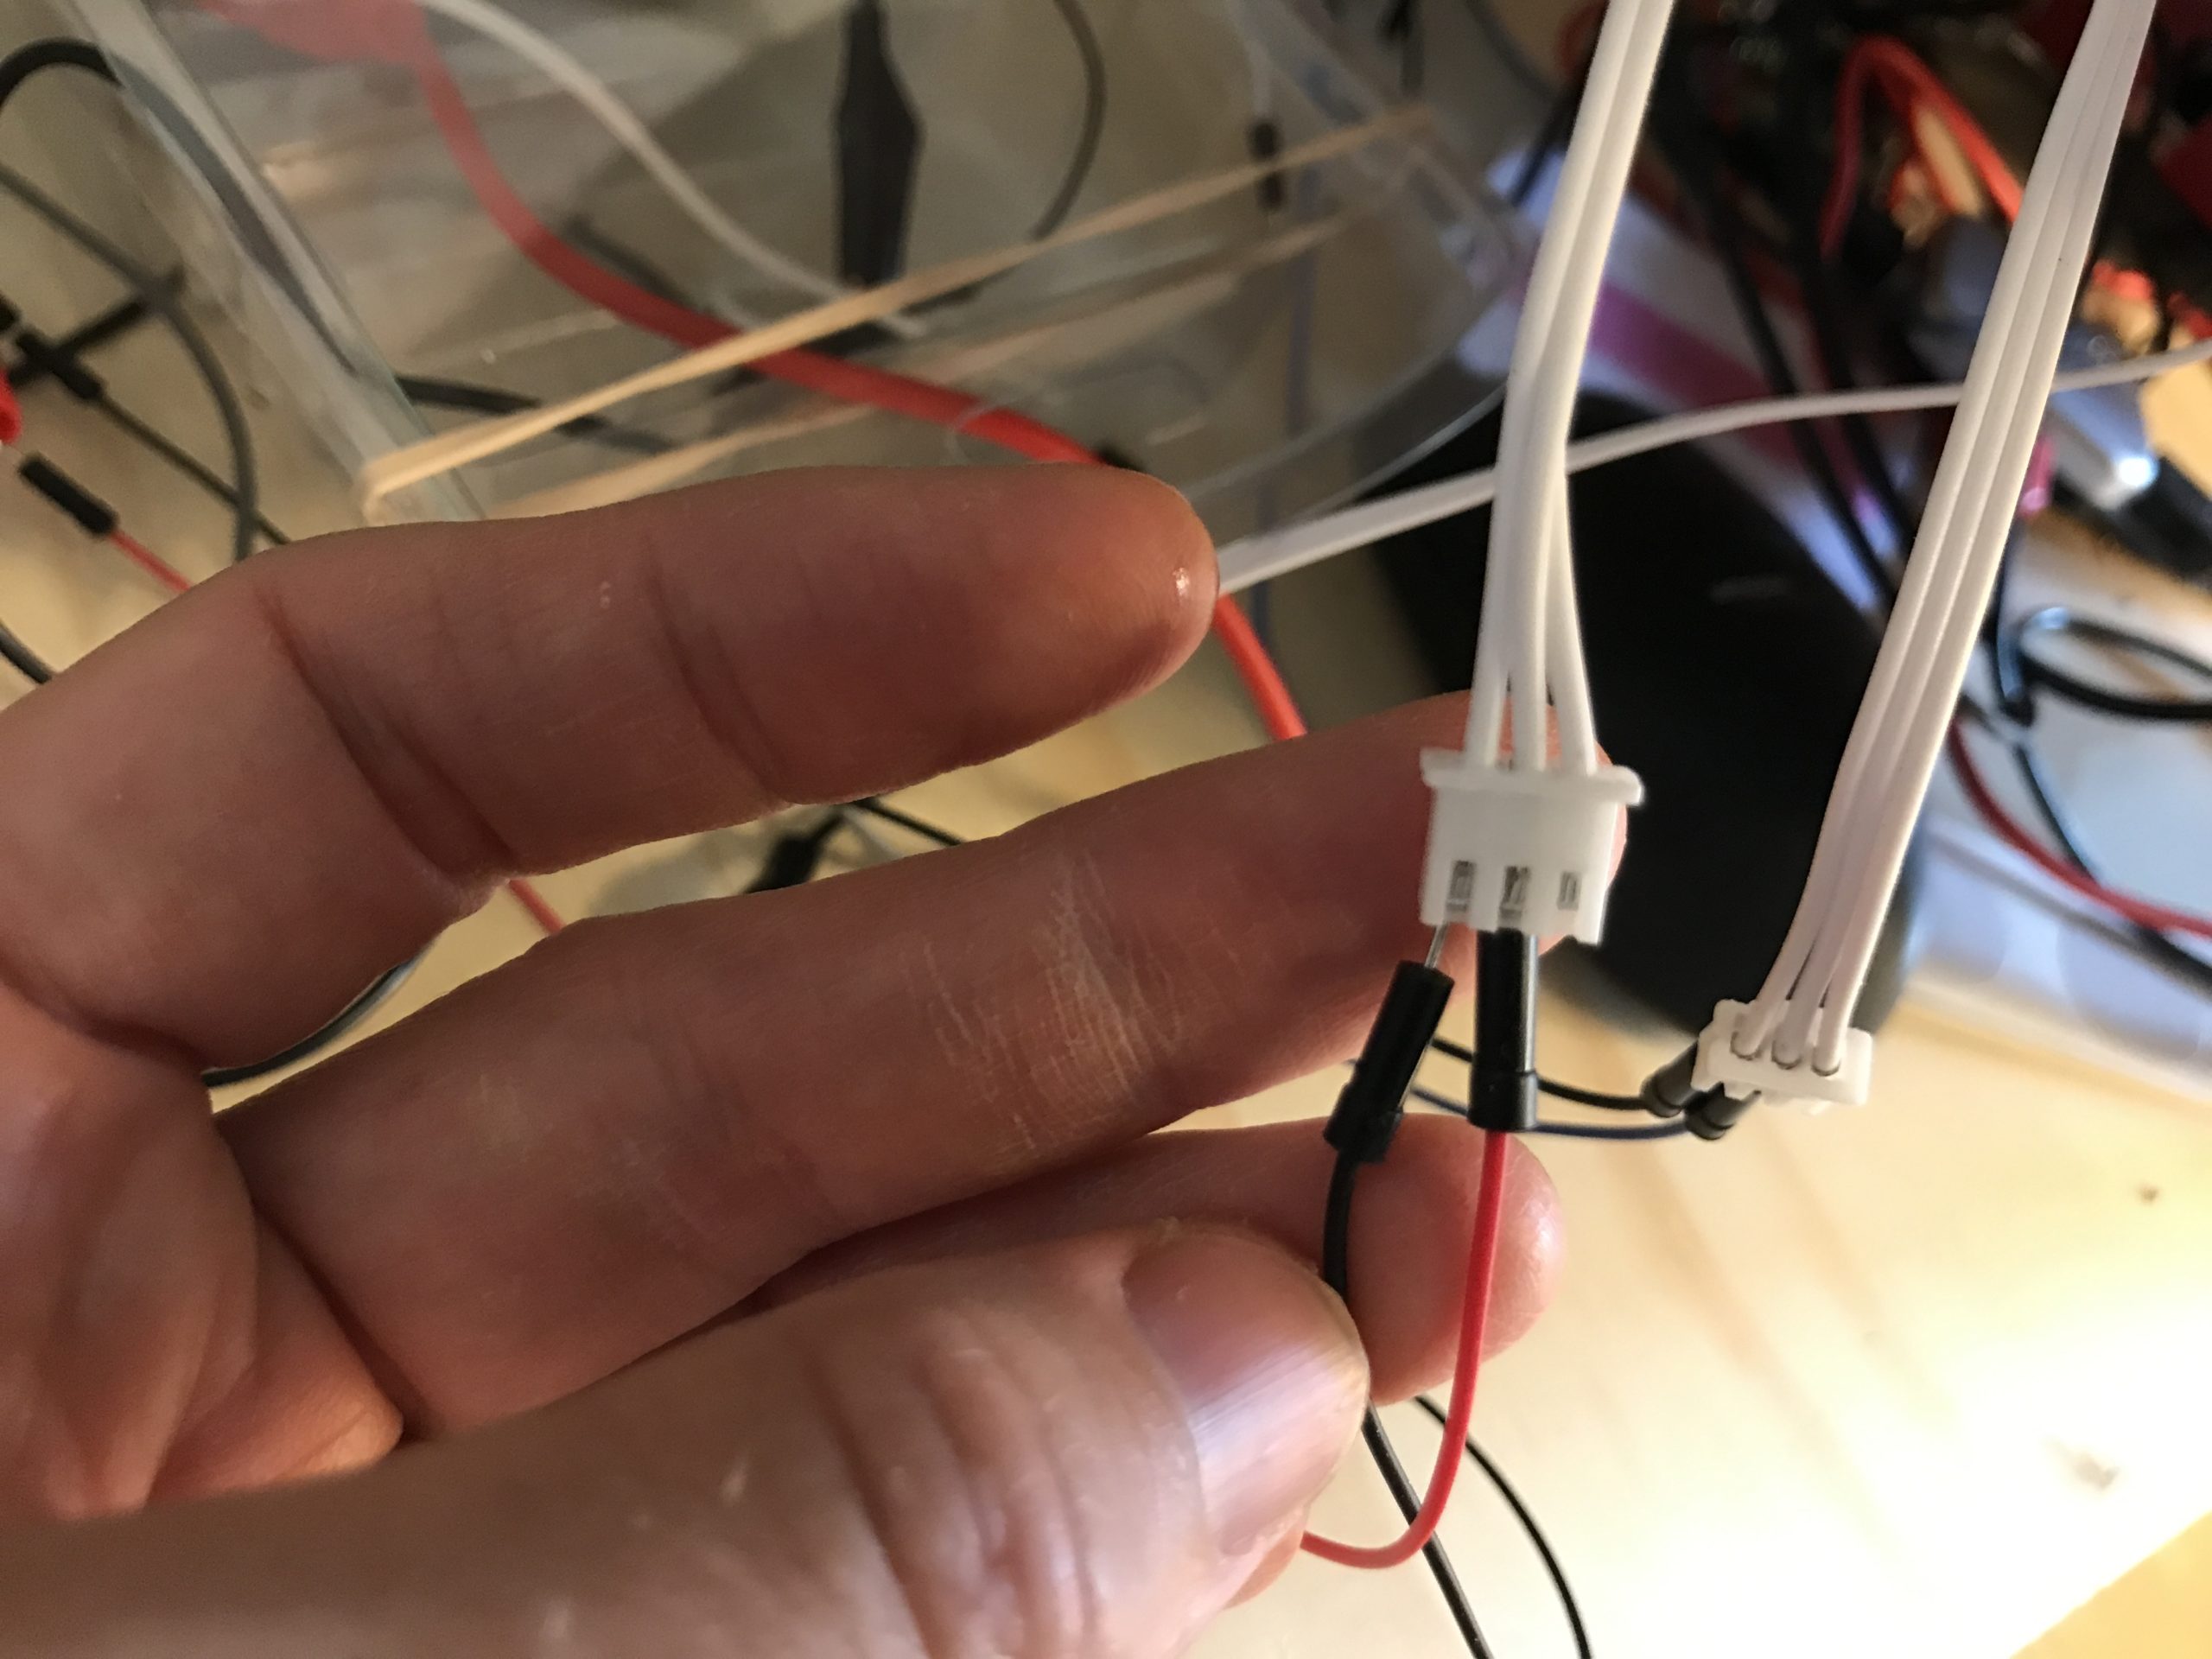
Which of the three holes should you plug into? Test your switch to make sure you get a connection; this is sometimes called testing for “continuity.” Here is a video explanation of how to test for continuity.
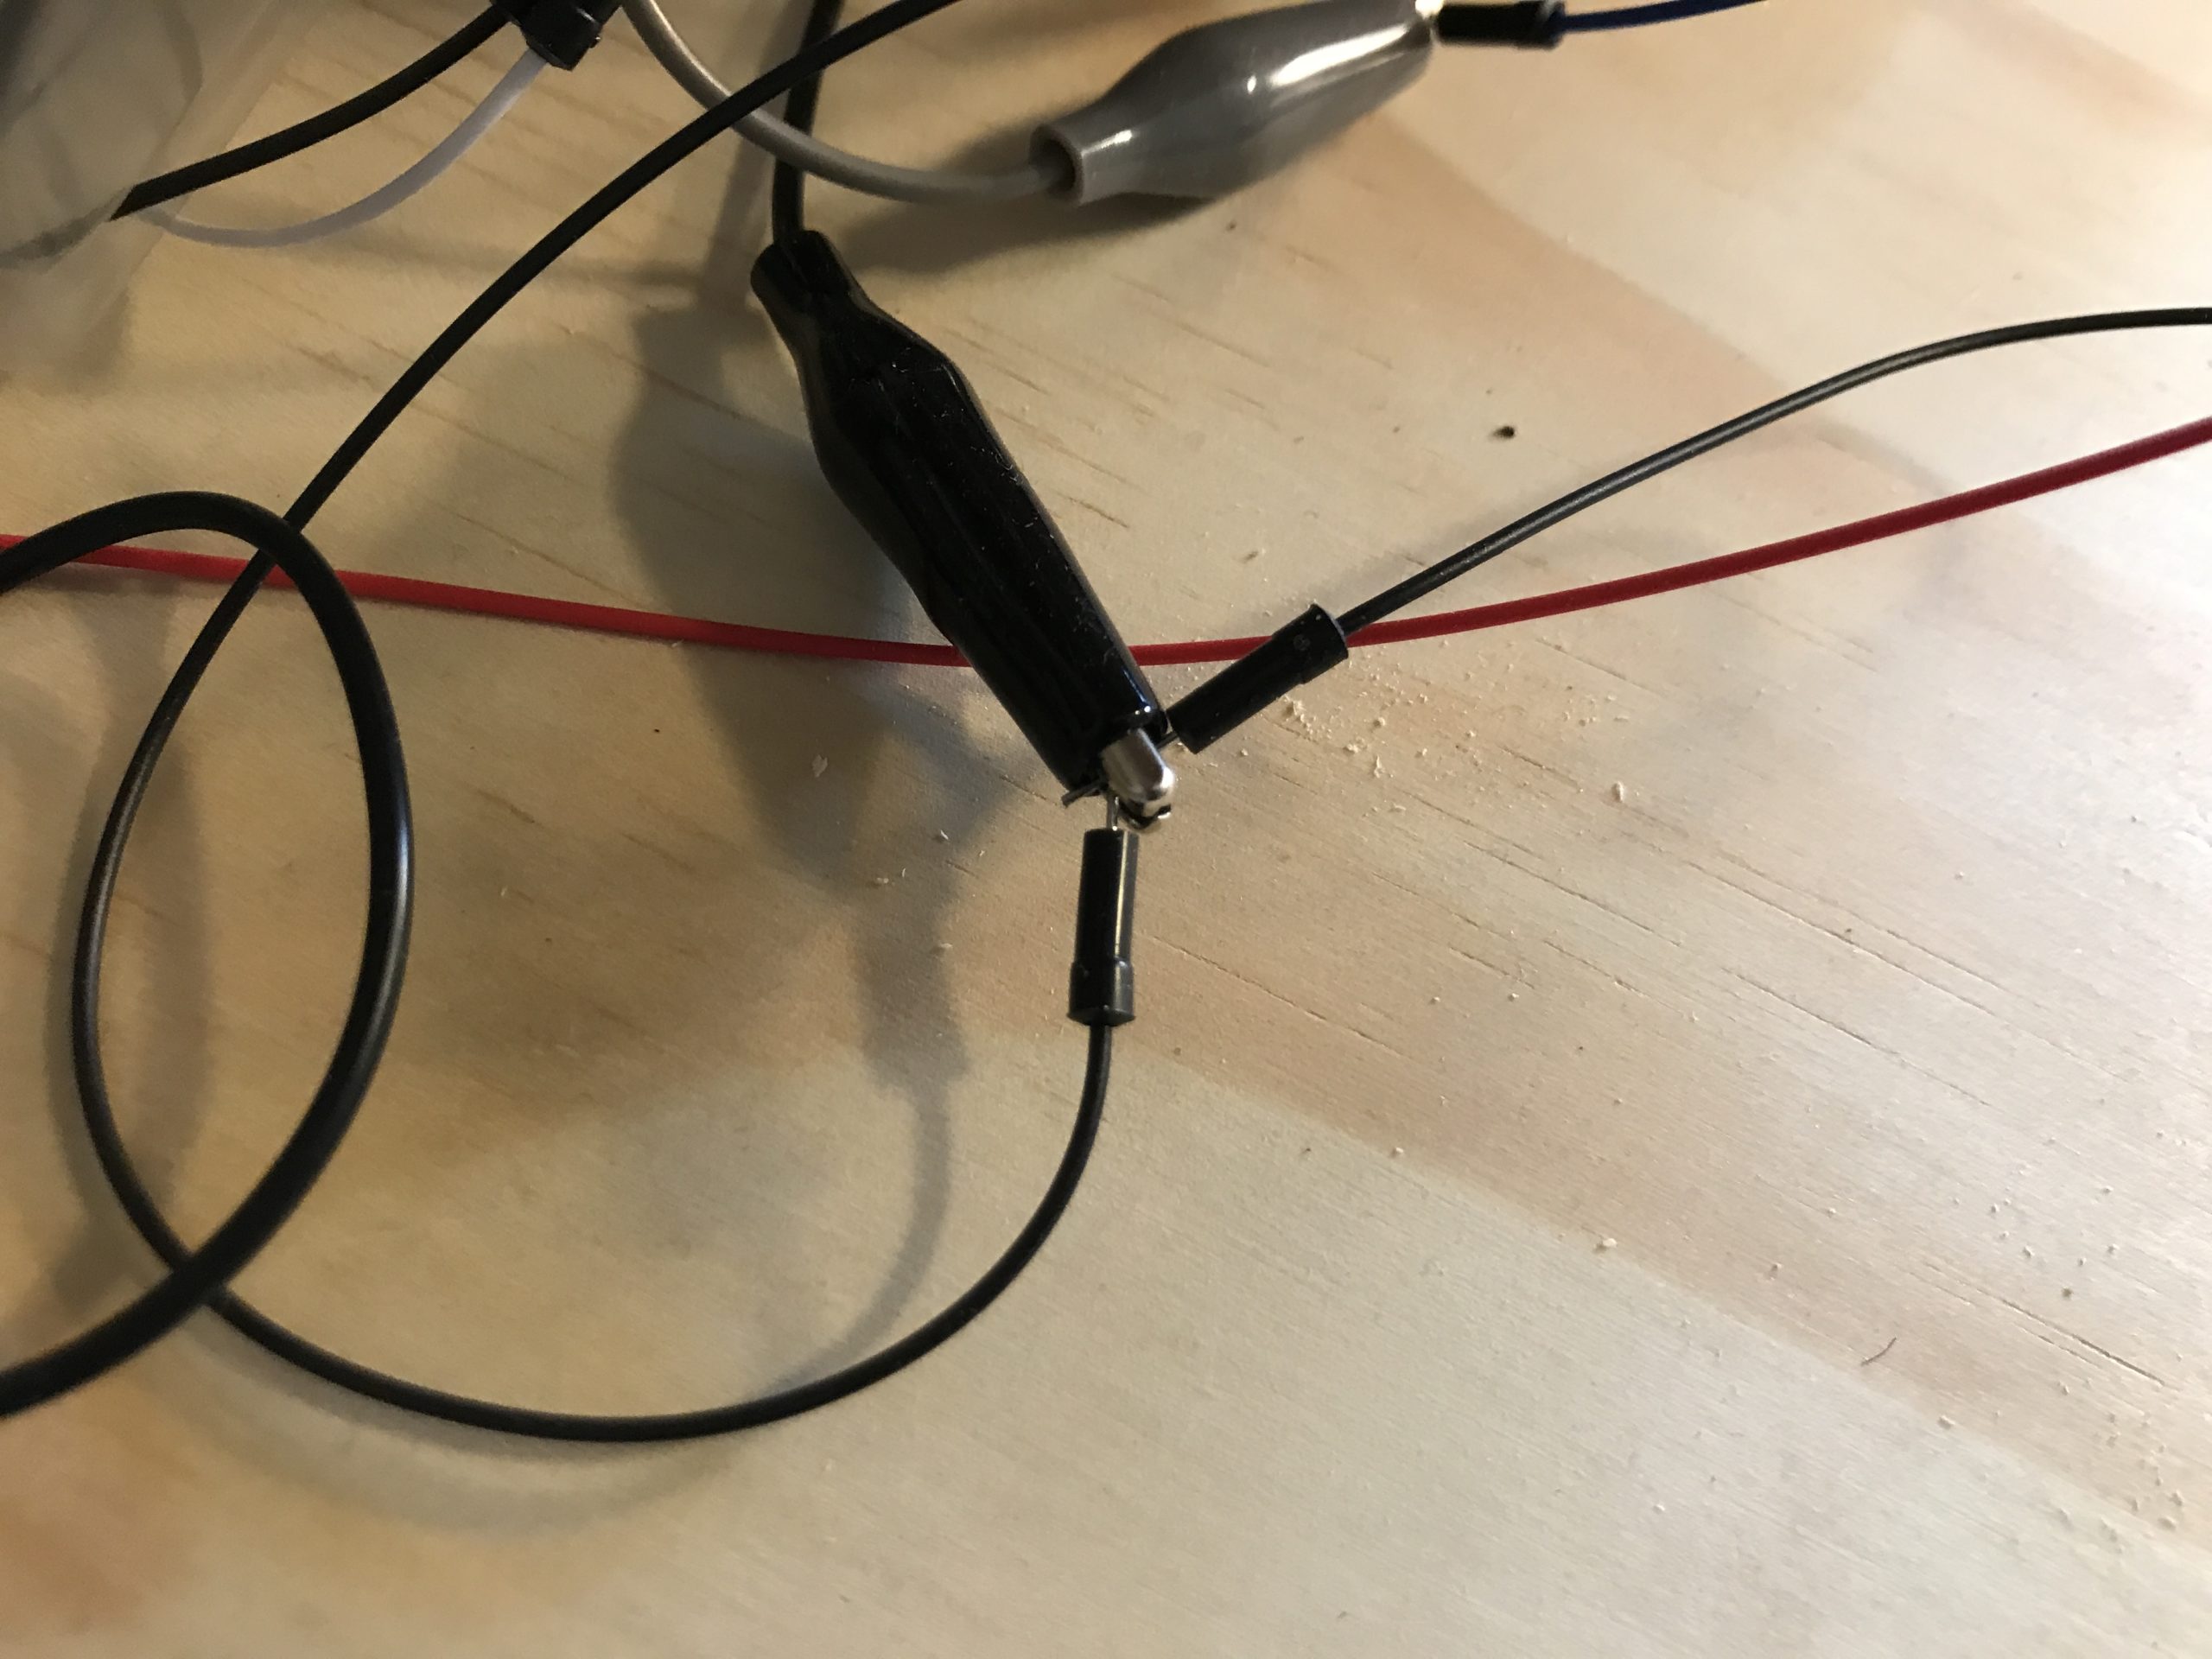
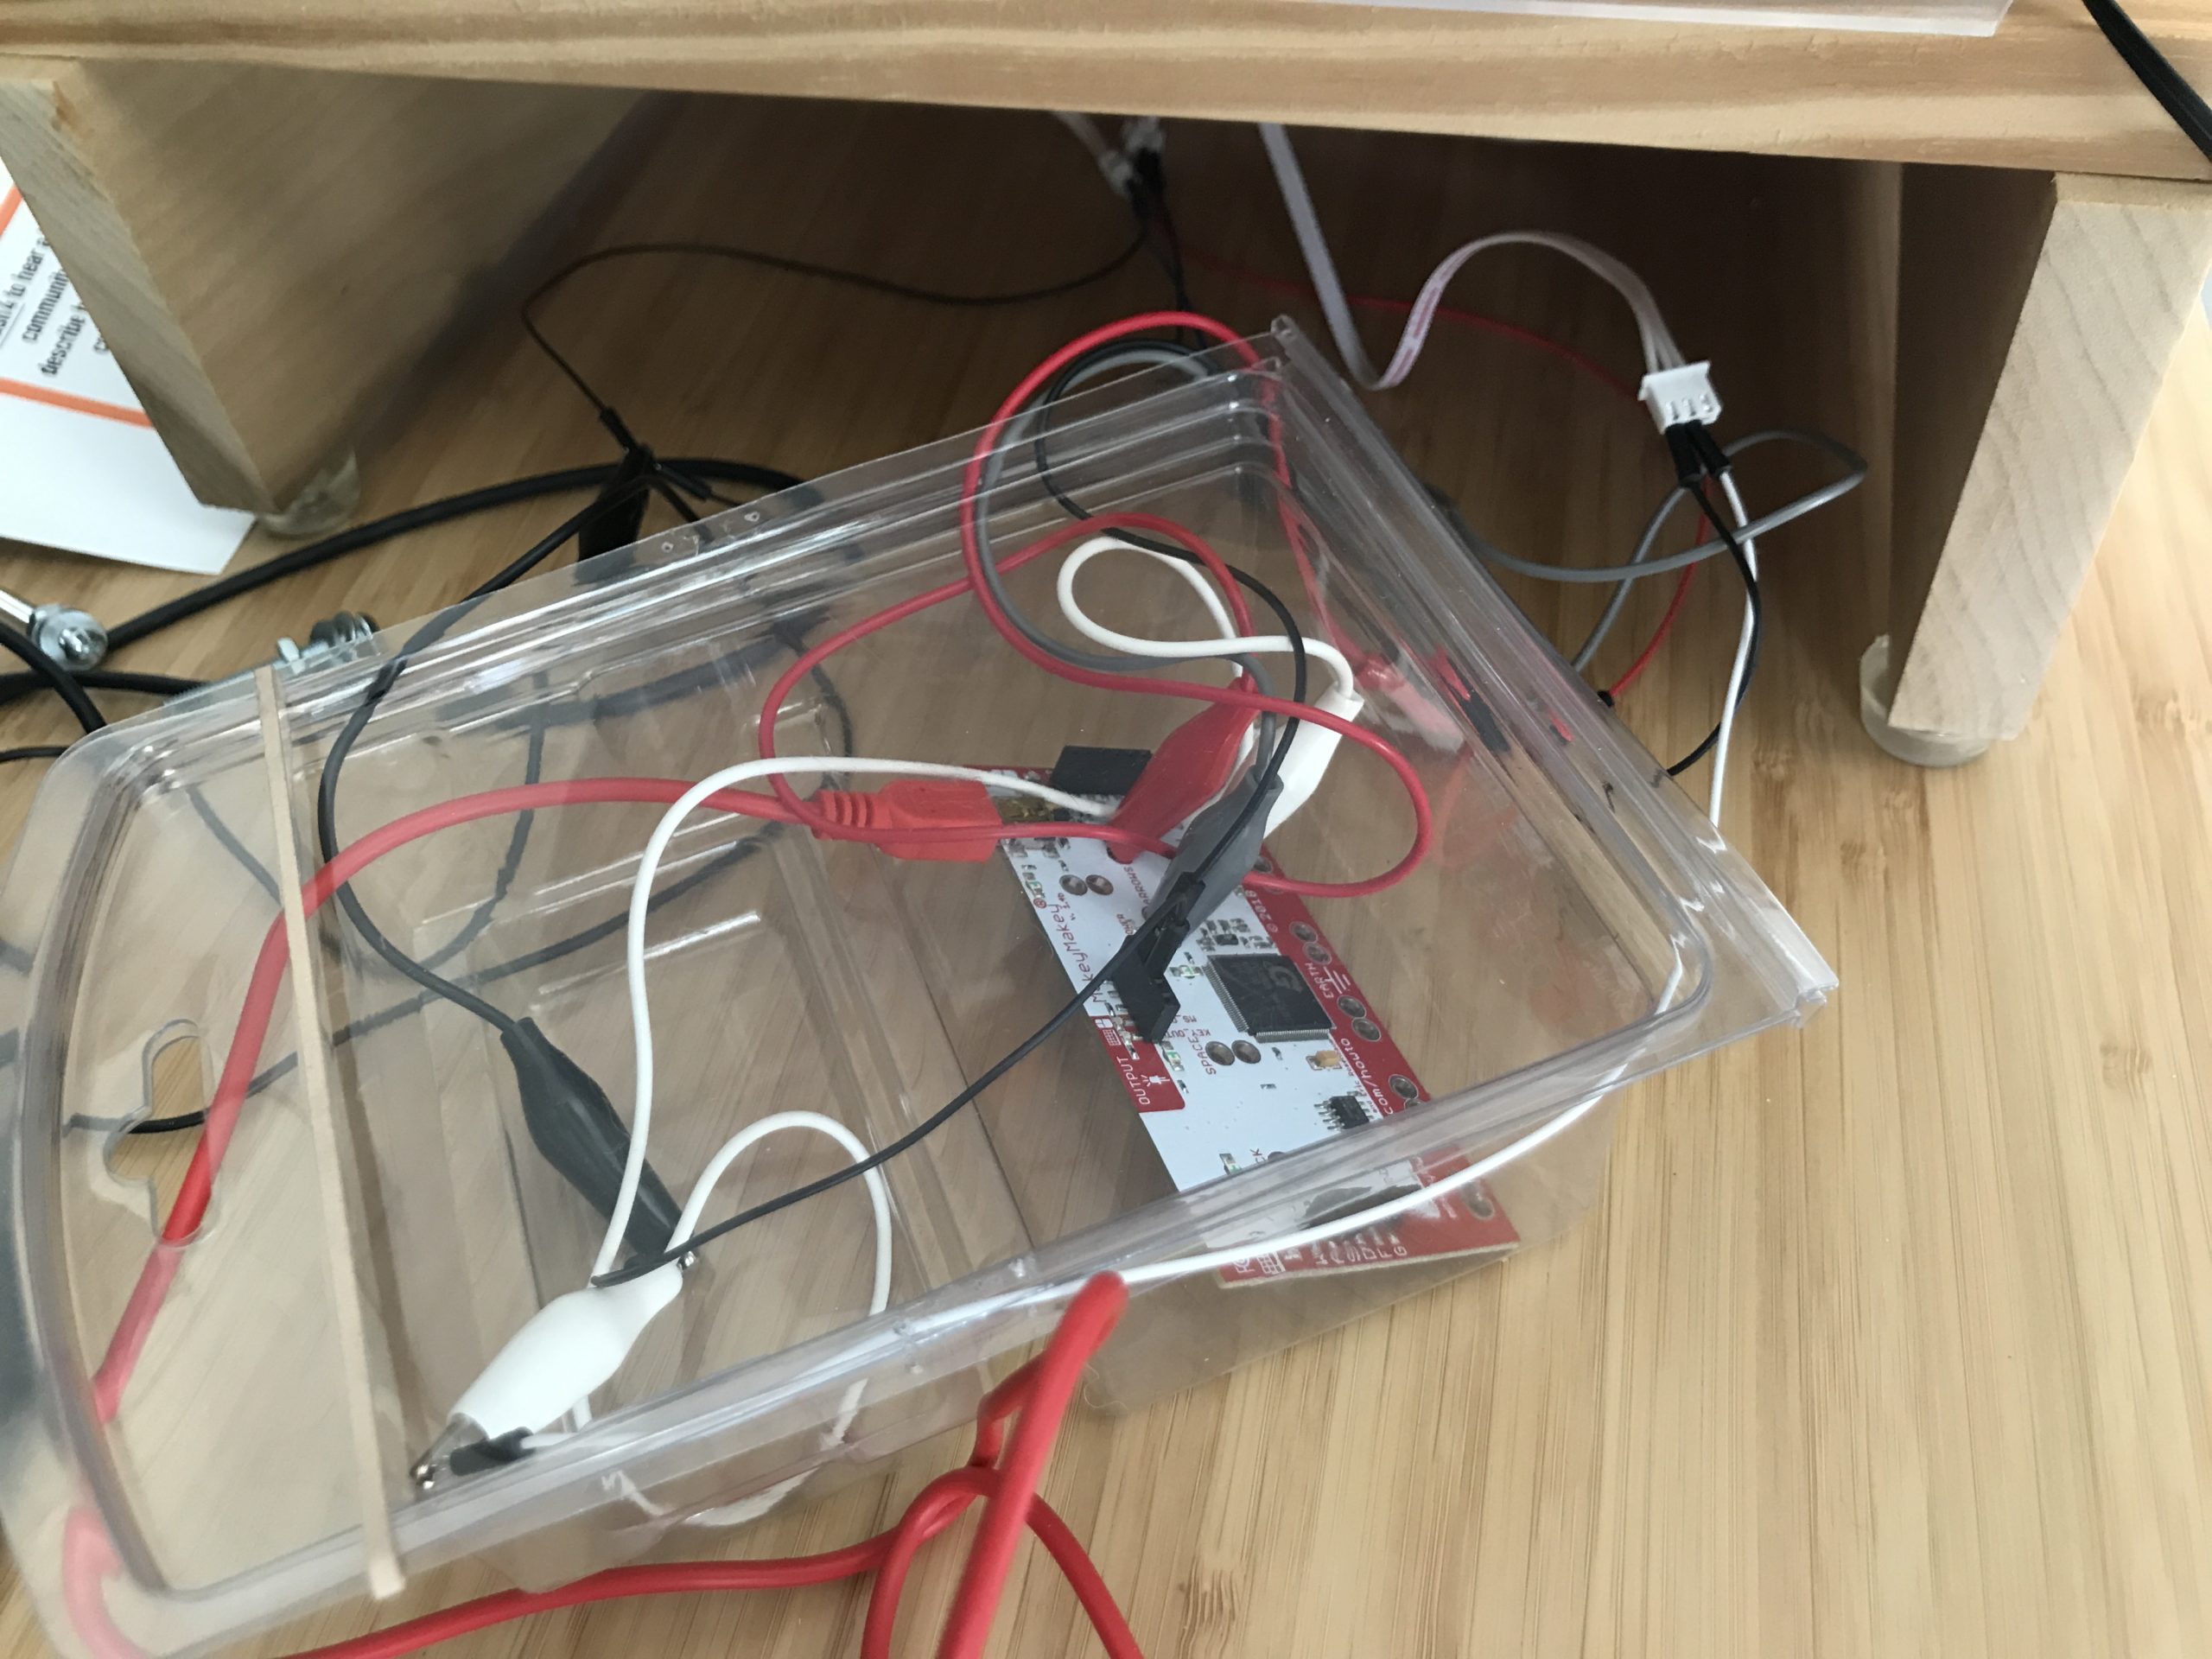
Then we can use alligator clips on the Makey Makey to connect to the wire plugs — or even to several wire plugs.
We discovered that an old plastic container helped keep everything in place and our wires from accidentally touching:
To drill the right size hole, we bought a bit that looks like this one:
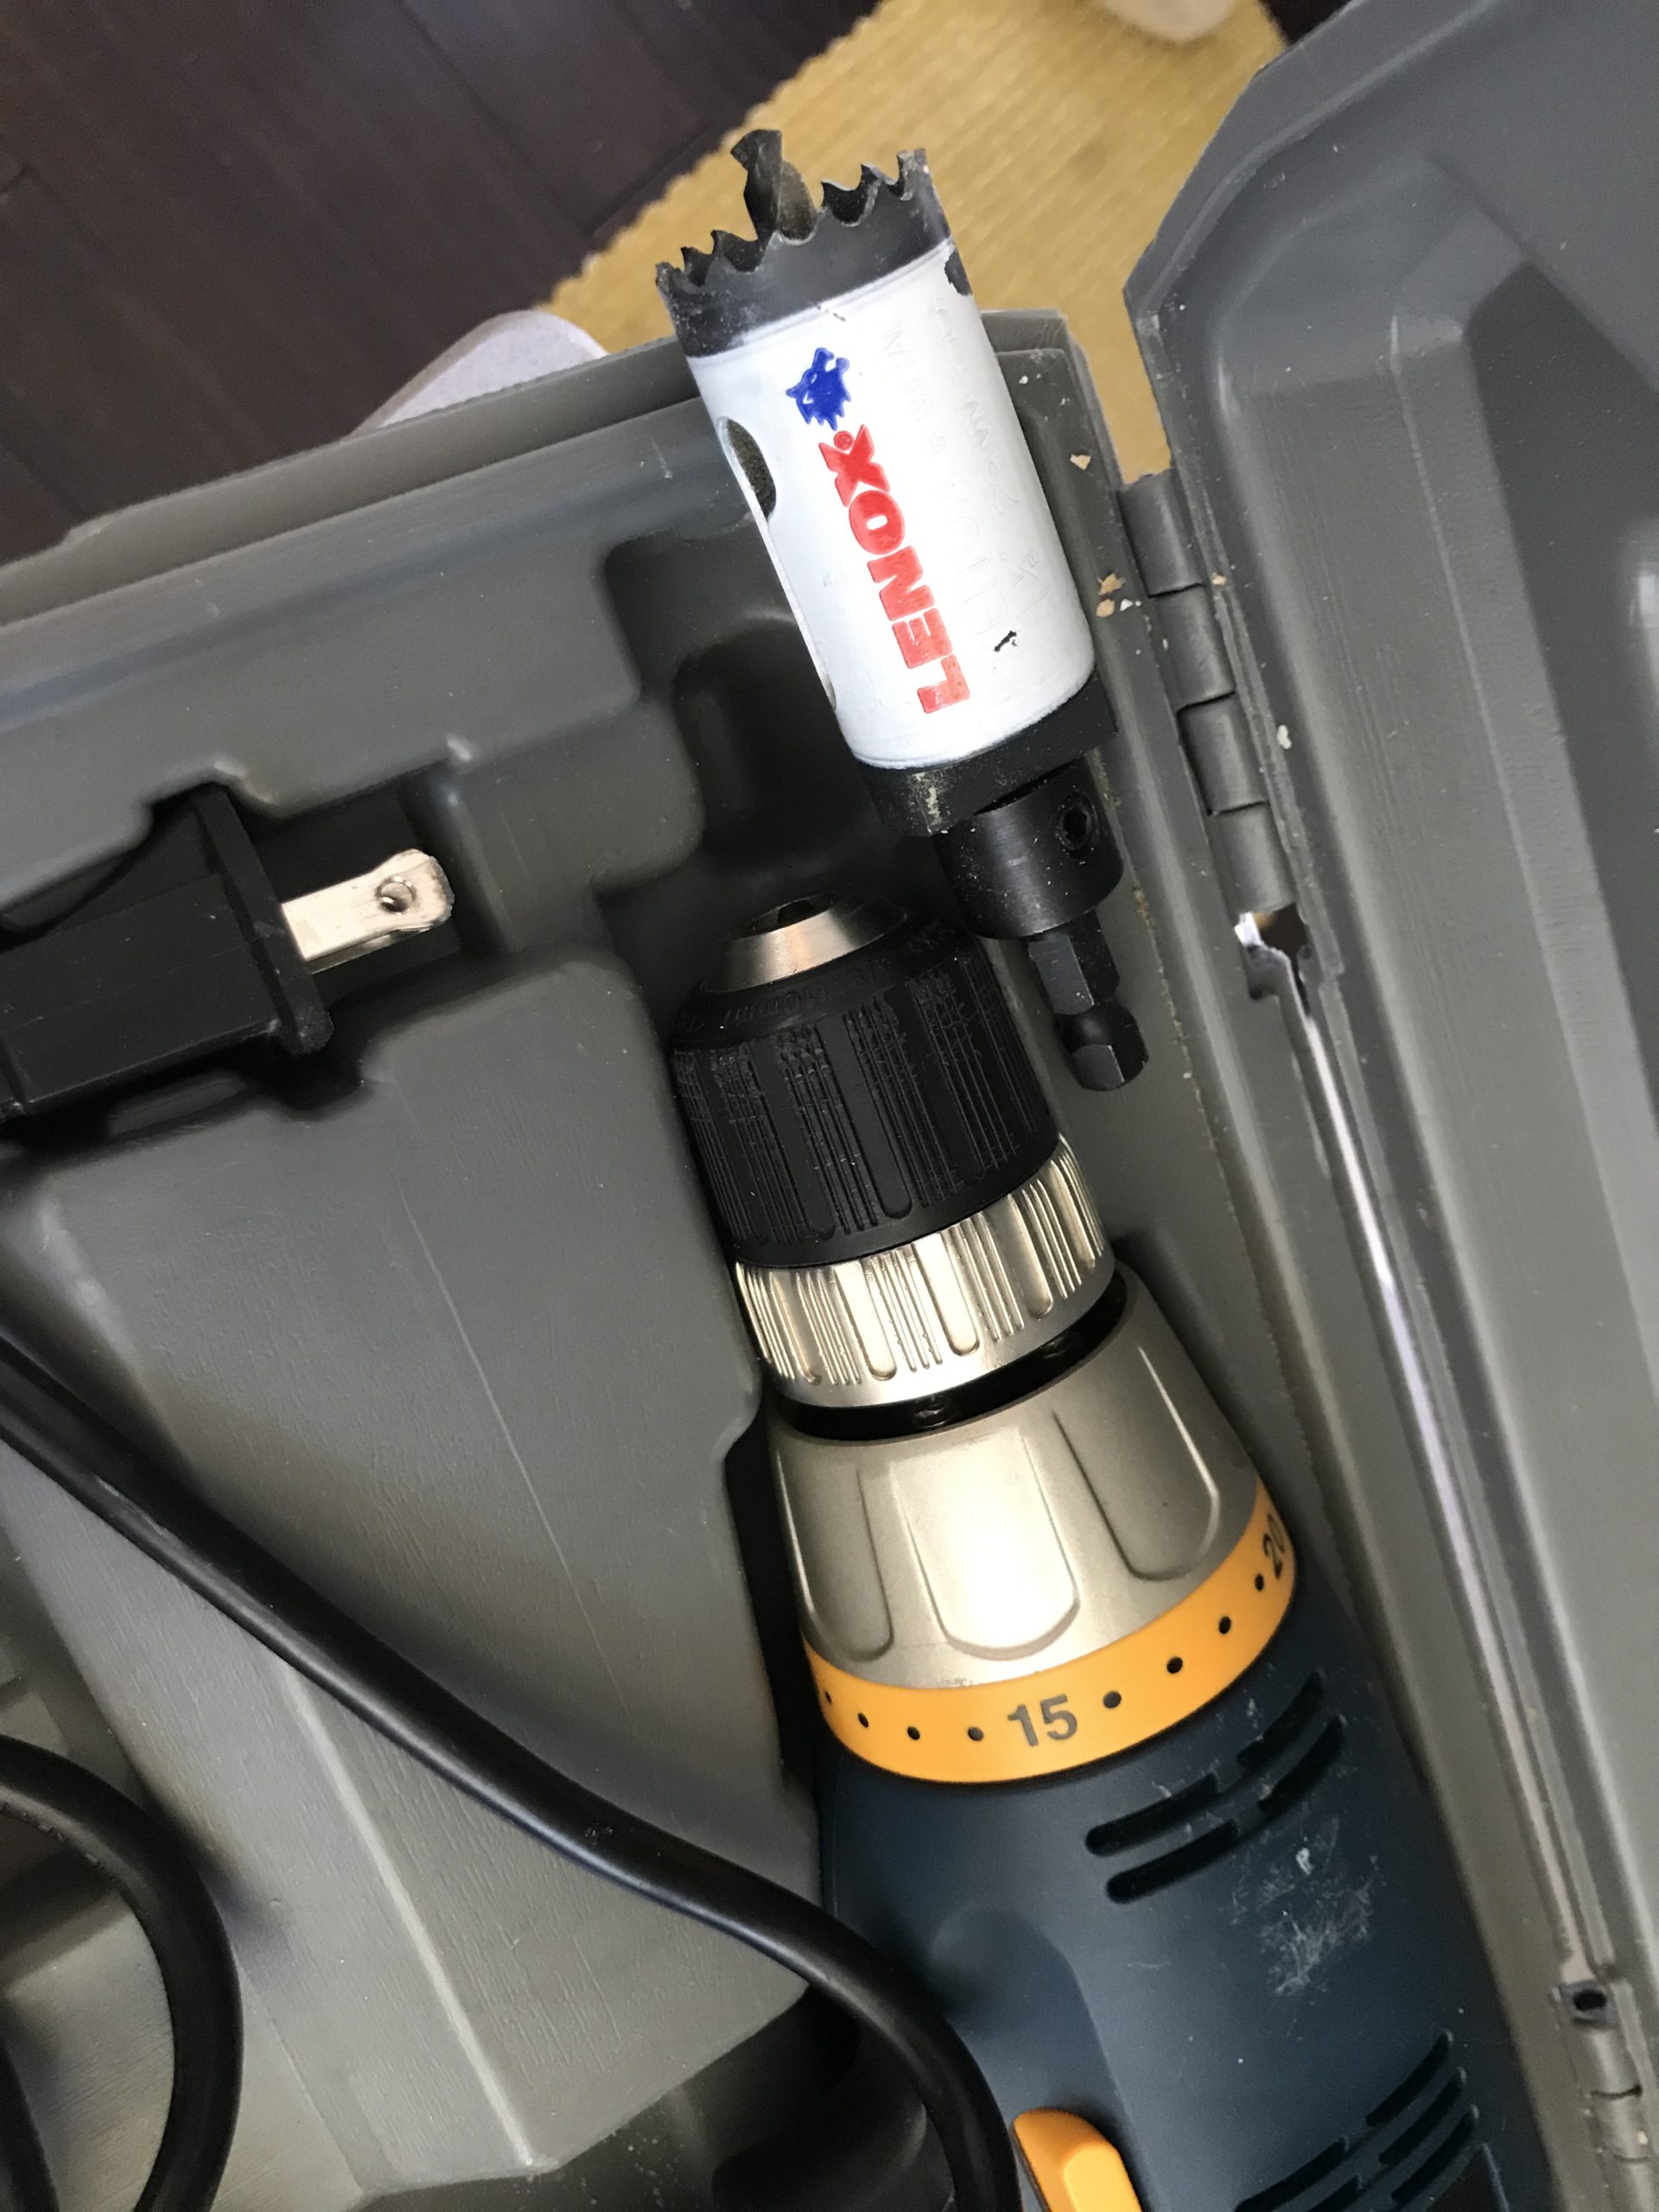
…that’s a 1 and 1/8 inch Lenox bit ($15 on Amazon, less as your local hardware store if they carry it). We tried smaller sizes but our buttons couldn’t fit in!
Step 4: Touch screen?

Read our guide to touch-screens for storytelling boxes.